Chocolate Mint Slice Bars
Highlighted under: Soft Planning
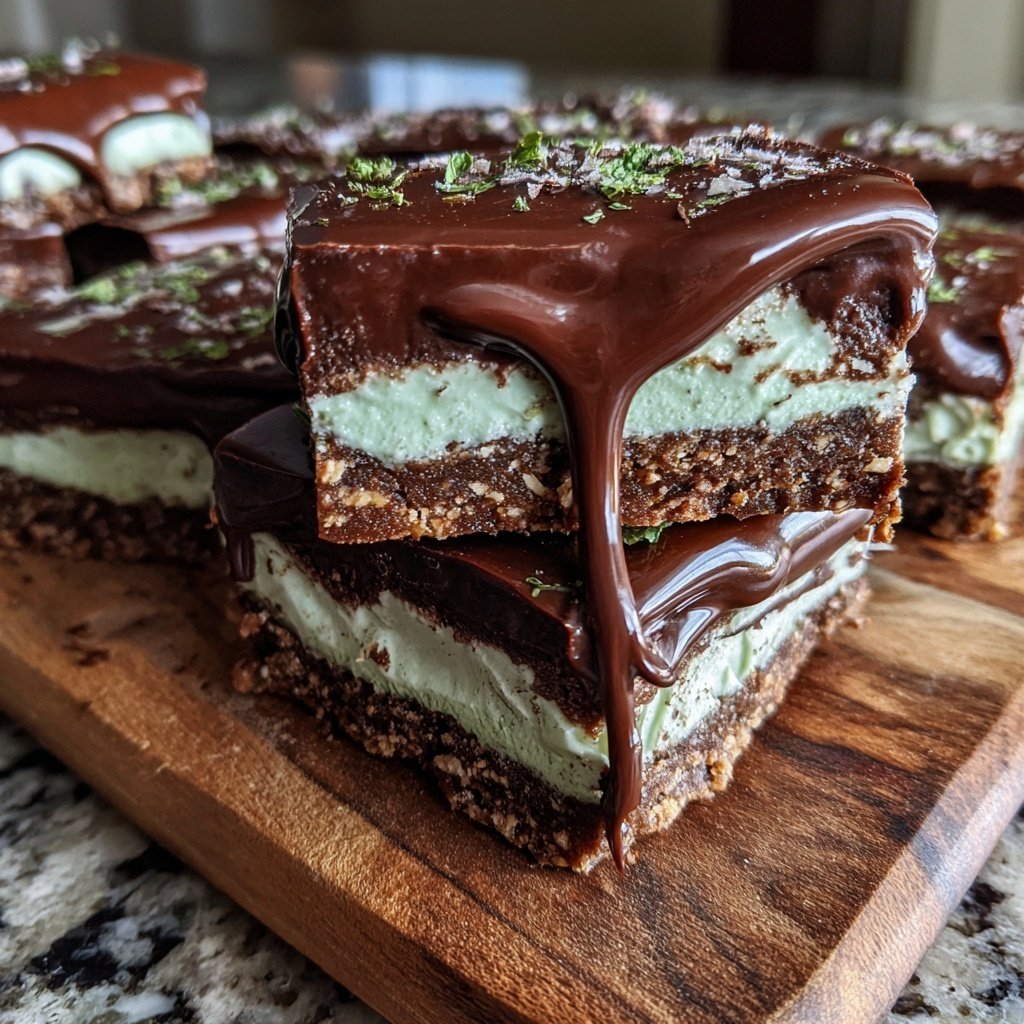
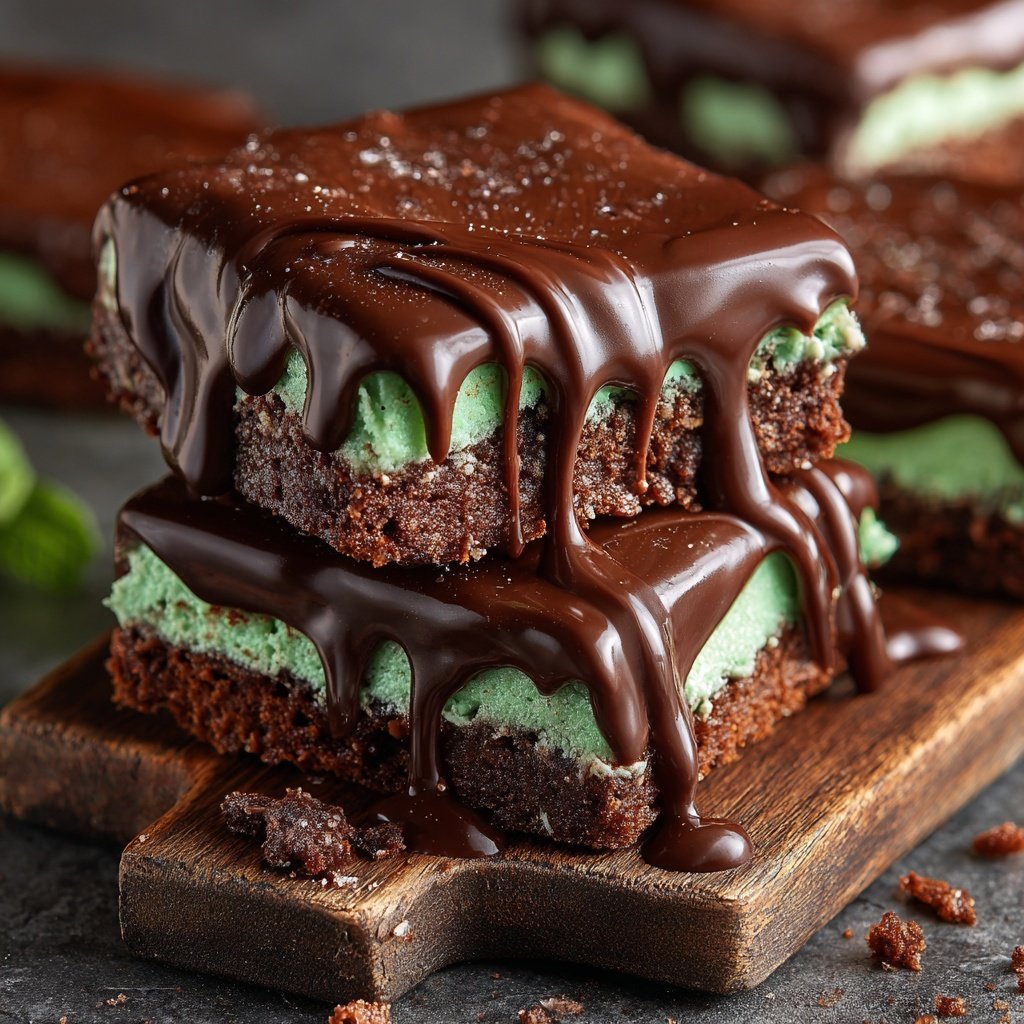
I absolutely adore making Chocolate Mint Slice Bars, especially when I want a treat that combines rich chocolatey goodness with a refreshing mint twist. This recipe has become a go-to for family gatherings and special occasions. The layers of creamy chocolate and mint blend together perfectly, creating an indulgence that is both satisfying and delightful. The best part? They come together in no time and require no baking, making them a stress-free dessert to whip up anytime!
Making these Chocolate Mint Slice Bars was a true labor of love for me. I remember the first time I tried them – I was skeptical about the mint, but once I took a bite, I realized how well it paired with the chocolate. The key is to use high-quality cocoa powder and fresh mint extract, as this enhances the flavor and gives the bars a refreshing taste that is just irresistible.
As I perfected this recipe, I found that chilling the bars for a bit longer yields a firmer texture, making them easier to cut. Utilizing a parchment-lined pan also ensures that they come out effortlessly. I can't recommend these enough for any chocolate lover!
Why You'll Love This Recipe
- Decadent layers of rich chocolate and fresh mint flavor
- No-bake dessert that's quick and easy to prepare
- Perfect balance of sweetness and minty freshness
Perfecting the Base Layer
For the base layer of your Chocolate Mint Slice Bars, the choice of digestive biscuits is paramount. These biscuits provide the ideal texture and flavor that truly complements the rich chocolate. When crushing the biscuits, aim for a mixture of fine crumbs with some larger pieces for added crunch. If you prefer a different flavor, graham crackers or chocolate cookies can be substituted, but be mindful of adjusting the sweetness level depending on your choice.
When mixing the melted butter with the crushed biscuits and cocoa powder, ensure that the butter is not too hot as it could make the mixture greasy. Mix until everything is just combined, and then use the bottom of a measuring cup or your fingers to press the mixture evenly into the baking dish. This ensures a firm, well-compressed base that holds up when cut into bars.
Creating a Creamy Mint Layer
For the mint layer, using softened cream cheese is critical for achieving a smooth consistency. You can speed up the softening process by cutting the cream cheese into small cubes and letting it sit at room temperature for about 15-20 minutes. When beating the cream cheese with icing sugar and peppermint extract, take care to blend until fully incorporated for a silky texture; any lumps can lead to an uneven consistency in the final dessert.
Adding food coloring is optional, but it can enhance the visual appeal of your dessert. Start with a small drop of green coloring and mix well; you can always add more until the desired shade is achieved. Although the coloring is purely aesthetic, it can make your Chocolate Mint Slice Bars feel even more festive and appealing for special occasions.
Melting and Pouring the Chocolate Topping
When melting the dark chocolate and butter, use a heatproof bowl set over simmering water—a technique known as a double boiler—to prevent the chocolate from burning. Stir the mixture constantly until the chocolate is glossy and completely melted. If you don't have a heatproof bowl, you can microwave the chocolate in 30-second intervals, stirring in between, but watch closely to prevent overheating, which can cause it to seize.
After pouring the melted chocolate over the mint layer, use a spatula to spread it evenly across the surface. This not only ensures each bite has that delicious chocolate topping but also helps create a beautiful glossy finish that is visually stunning. Allow the bars to chill in the refrigerator until fully set, which might take longer if your fridge is warmer; expect about two hours minimum for firm results.
Ingredients
Ingredients
Base Layer
- 200g digestive biscuits, crushed
- 100g unsalted butter, melted
- 50g cocoa powder
Mint Layer
- 250g cream cheese, softened
- 150g icing sugar
- 1 tsp peppermint extract
- Green food coloring (optional)
Chocolate Topping
- 200g dark chocolate, chopped
- 50g unsalted butter
Instructions
Instructions
Prepare the Base Layer
In a mixing bowl, combine the crushed digestive biscuits, melted butter, and cocoa powder. Mix until well combined. Press the mixture firmly into the bottom of a lined 8x8 inch baking dish.
Make the Mint Layer
In another bowl, beat together the softened cream cheese, icing sugar, and peppermint extract until smooth. If desired, add a few drops of green food coloring for a minty hue. Spread the mint mixture evenly over the base layer.
Prepare the Chocolate Topping
Melt the dark chocolate and butter together in a heatproof bowl over simmering water, stirring until smooth. Pour the melted chocolate over the mint layer, spreading it evenly.
Chill and Serve
Refrigerate the dish for at least 2 hours or until set. Once firm, cut into bars and enjoy!
Pro Tips
- Let the bars sit at room temperature for a few minutes before cutting. This makes slicing easier and helps prevent the chocolate from cracking.
Storage and Make-Ahead Tips
These Chocolate Mint Slice Bars are perfect for making ahead of time. Once fully set, they can be stored in an airtight container in the refrigerator for up to one week. If you plan to keep them longer, consider freezing them. To freeze, cut the bars into individual pieces and wrap each one tightly in plastic wrap before placing them in a freezer-safe container, where they can last up to three months.
When ready to serve, simply thaw the bars in the refrigerator for a few hours. Avoid leaving them out at room temperature for extended periods to maintain their texture and taste. This make-ahead capability is what makes them ideal for parties or impromptu gatherings.
Serving Suggestions and Variations
To elevate the serving experience, consider garnishing your Chocolate Mint Slice Bars with a sprinkle of crushed peppermint candies or cocoa powder for added visual appeal and texture. You can also drizzle extra melted chocolate over the top before chilling for a more decadent finish. Serving with a dollop of whipped cream or a scoop of vanilla ice cream would complement the chocolate and mint flavors beautifully.
For a unique twist, you might incorporate other flavors into the mint layer. Try using orange extract instead of peppermint for a chocolate-orange variant, or you can swirl in a raspberry puree atop the mint layer for a fruity addition. Experimenting with these variations can keep your dessert lineup exciting and fresh!
Questions About Recipes
→ Can I use a different type of biscuit?
Yes, you can substitute digestive biscuits with graham crackers or any other sweet biscuit of your choice.
→ How long will these bars last?
They can be kept in the refrigerator for up to a week in an airtight container.
→ Can I substitute cream cheese?
You can use mascarpone or a dairy-free cream cheese alternative if desired.
→ Is it necessary to add food coloring?
No, the food coloring is optional. It adds a fun visual but does not affect the flavor.
Chocolate Mint Slice Bars
What You'll Need
Base Layer
- 200g digestive biscuits, crushed
- 100g unsalted butter, melted
- 50g cocoa powder
Mint Layer
- 250g cream cheese, softened
- 150g icing sugar
- 1 tsp peppermint extract
- Green food coloring (optional)
Chocolate Topping
- 200g dark chocolate, chopped
- 50g unsalted butter
How-To Steps
In a mixing bowl, combine the crushed digestive biscuits, melted butter, and cocoa powder. Mix until well combined. Press the mixture firmly into the bottom of a lined 8x8 inch baking dish.
In another bowl, beat together the softened cream cheese, icing sugar, and peppermint extract until smooth. If desired, add a few drops of green food coloring for a minty hue. Spread the mint mixture evenly over the base layer.
Melt the dark chocolate and butter together in a heatproof bowl over simmering water, stirring until smooth. Pour the melted chocolate over the mint layer, spreading it evenly.
Refrigerate the dish for at least 2 hours or until set. Once firm, cut into bars and enjoy!
Extra Tips
- Let the bars sit at room temperature for a few minutes before cutting. This makes slicing easier and helps prevent the chocolate from cracking.
Nutritional Breakdown (Per Serving)
- Calories: 200 kcal
- Total Fat: 12g
- Saturated Fat: 7g
- Cholesterol: 25mg
- Sodium: 90mg
- Total Carbohydrates: 25g
- Dietary Fiber: 1g
- Sugars: 15g
- Protein: 3g